Showing posts with label Beauty. Show all posts

Thursday, July 14

NEW Colourpop Ultra Metallics Review + Swatches!


When the first round of Ultra Metallics Colourpop released ($6 each), I wasn't super excited by the colors since they were darker than I was anticipating. However, when they started announcing new colors that were brighter, I knew I wanted to place an order for one or two. I initially had my eyes on JIC, however it wasn't listed when I purchased mine so I decided on Lights Out and Flitter. However, now that I know I love the formula and finish, I may order a few more soon!


The texture for both of these Ultra Metallics is way thicker than the Ultra Mattes I own and have an almost mousse-like texture, similar to the way a Julep liquid lipstick I have feels. These definitely live up to their name and are stunning, shiny, eye-catching lip colors but even so, they are super smooth to apply and try to a kind of satin texture that doesn't transfer too much.
I originally wanted JIC, a gorgeous, light, cool-toned pink, but it wasn't available when I was purchasing so I grabbed Flitter instead. Flitter is a gorgeous warm pink that reflects gold and is a little less in-your-face of a metallic lip. It definitely needs either a thick coat or two thin coats for full coverage. I also found with this one to make sure it "dries" (it doesn't dry matte, but it definitely sets in and becomes less wet) before pressing my lips together or anything because it can pull of some of it.
Lights Out is a bright, super reflective true gold that's not too warm. I found that it applied really
evenly with one coat, but I probably ended up using more like one and a half coats so it was really opaque. I don't know if it's evident in the photos, but Lights Out reflects more like a linear shimmer than Flitter does, which reflects like a scattered glitter. I wore this color all day recently and it stayed on really well, even through eating!

Overall, I think I will probably buy more of these, depending on the other colors that they release. I do still want to get my hands on JIC so I may add pictures of that to this post if I do!
Have you tried these? Or any other Colourpop products?

Thanks for reading! xo
Hannah

Follow my blog with Bloglovin!

Tuesday, June 7

Self Tanning Routine ft. Toma's Liquid Spray Tan Review!


Summer's coming up which means my tanning routine is more frequent now than the rest of the year and is definitely something I enjoy pampering myself with. I haven't noticed Toma's Tan getting much attention from any YouTubers I watch or bloggers I follow but it's my favorite tanner so I figured I'd write a bit about my tanning routine!

I buy my tanner, Toma's Liquid Spray Tan, from Sally Beauty Supply for about $17. I have yellow under toned skin that gets warm when I naturally tan in the sun so some self tanners can make me look orange. This tanner is slightly pink-based when it goes on, cancelling the chance of it looking too fake (it is a fake tan, after all) so it works really well with my skin tone. I previously used the Toma's Tan Perfect Self-Tanning Lotion which, as the name states, is a lotion rather than a liquid spray. It's good as well, however I like that the liquid one isn't as warm toned and it's easy to apply with the mitt it comes with.

| Supplies |

  • Tanning mitt
  • rubber gloves
  • coconut oil and sugar (or any scrub)
  • kabuki brush
  • thick lotion
  • moisturizer
  • Toma's Tan Liquid Spray Tan

| The Process |
I start off the day before (or morning of) by mixing up an exfoliant with coconut oil and sugar until it holds together well but isn't dry. Using gloves I exfoliate my legs thoroughly, my arms, and my upper chest as well. Basically I apply it to areas that can get dry skin or that tanner comes off quickly from.
Once I have applied my scrub, I lather it with body wash on my legs and shave them carefully. Since shaving after self tanner tends to take some of it off, I always shave before applying tanner to make sure it lasts.
When it comes to applying this tanner,, I always apply it at night. I wear rubber gloves and spray several times on the mitt and immediately work it in since it does kind of dry and can take of the indicator if I apply fresh tanner over dried tanner. I like to apply it starting with my upper back, then my upper chest and the underside of my arms (since my outer arms are darker during the summer), avoiding my elbows and hands entirely then move on to my lower back and stomach. I apply it to my legs last, avoiding my knees like I did to my elbows.
Lastly I grab a kabuki brush and apply tanner to my neck and the left over product on my ears. I mix a bit of facial moisturizer and a spray or two of tanner and buff it into my face thoroughly. For my hands, I remove my gloves and blend in a tiny bit of tanner upwards on the inside of my wrists so there's not a harsh line. For my knees, I use a mixture of about 80% lotion and 20% Toma's Tan since my knees are naturally a bit darker than the rest of my legs. I blend my ankles into my legs the same way I did my hands but with a bit of lotion.

Although this tanner does have an indicator (which does make it really easy to see exactly where it's been applied), it doesn't come off on my clothes or sheets so I always wear loose clothing and let it soak in over night. In the morning I wash off the indicator using some body wash and bypassing the loofah entirely so I don't disrupt my new tan.

That's my whole process! It doesn't take too long and my tan always looks really even. It usually lasts for a week or so, depending on if I swim, work out (extra showering) or shave. I also like to apply lotion daily to keep my skin from getting dry so it holds my tan better. For upkeep I apply tanner again without exfoliating every time, especially if my tan is wearing off evenly.

What's your go-to tanner?
Thanks for reading! xo
Hannah

Follow my blog with Bloglovin!

Monday, March 21

Colourpop Ultra Mattes Haul + Swatches


I've been wanting to try out some of Colourpop's ultra mattes ($6 each through their website) since my best friend ordered a few of them a while ago. Because I got a $5 off coupon for signing up through my email, I decided it was the perfect timing to pick up the ones I'd been eyeing! Keep in mind for these swatches I was wearing a thin layer of EOS lip balm under the lip products. Also I tried to get the colors as accurate as possible, however Midi in particular is a bit pinker toned than it looks here.


I've be able to wear each of these for a while and I am definitely impressed with the long wear! I think the longest I've worn one of them for is about 8 hours and by the end of the day I was personally more done with wearing the lip product than the lip product itself was. These do all dry completely matte after a few minutes (especially without lip balm) so all of the swatches shininess isn't necessarily 100% representative. Lumiere 2 has a slightly satin finished compared to the rest and Rooch is the most matte and can be drying. I'm not sure how obvious it looks in the swatch picture but it can sometimes apply a bit unevenly if it's done quickly. I did find that it can flake a bit if I wear it for long enough and don't use enough lip balm.
As far as favorites go so far, Trap and Kapow are my favorites but I'm happy with all of them! Colourpop recently released liquid lipsticks with an ultra satin finish and I've been lusting after Marshmallow so I'll probably give in sometime soon.

Any opinions on these or any of Colourpop's other products? This was my first experience and I'm really pleased!
Thanks for reading!
Hannah

Friday, January 15

It Cosmetics Brow Power Review + Demo ♡


A long while back at Ulta there was a promotion for a free It Cosmetics Brow Power travel-size pencil with any $10 purchase, a deal I couldn't pass up. My sister and I both got one and, even though we have different colors of eyebrows, we both love it!
The color is Universal Taupe, something I was initially skeptical of, however since I usually reach for taupe-colored brow products, I was expecting it to match mine pretty well. Amelia, however, has darker, warmer toned eyebrows which I was excited to see the product on to compare.
The pencil is double ended: one end is a thin, twist up brow pencil and the other is a spoolie. I don't have any pictures of mine since I broke it off on accident and misplaced it, however Amelia has photographic evidence of hers. I love that it does come with one, especially since it's easier and faster to use and store. 


The most impressive aspect of Brow Power is its ability to match so many different colors of brows. I have neutral toned medium brown eyebrows and it matches them perfectly. I like to vaguely outline the top and bottom of my brows and lightly fill in the front using vertical strokes; the middle and tail I make a bit darker. Amelia has naturally thicker, darker brows than I do and it still looks really natural too!
I tried to swatch the pencil using a variety of pressures to demonstrate its range of changing tone and depth depending on the pressure applied to it. 

Have you tried this pencil? What hair color do you have?
Thanks for reading! xo


Friday, August 7

Zoya Naked Manicure Women's Starter Kit Review ♡


Zoya released a new line of polishes at the beginning of this month called Naked Manicure. Being someone who struggles with flaky, weak, thin nails, I was immediately intrigued and decided to purchase it. I originally set out to pick up the Women's Starter Kit in store at Ulta, however Ulta doesn't supply the kits and instead sells the polishes individually which is, unfortunately, much pricier. I ordered the kit through Zoya's website (linked earlier) and received it quickly. It comes with the Naked Base ($12), the Pink Perfector ($10), the Tip Perfector ($10), and the Satin Seal Top Coat ($12), a $44 value, for $25 total. My package also came with a pamphlet full of information about the polishes, before and after pictures, descriptions of the ranges, and color combination charts for canceling out tainted nail colors.


I wish my nails were strong and healthy (like my dad's!) but since they're not I have to do what I can to keep them presentable. I mainly struggle with flaking, however I am growing out some stubborn staining from a polish I used a while back. I did use a baking soda and lemon juice soak on my nails to lighten it and it definitely helped remove some slightly orange discoloration from the tips.


The first step is to apply Naked Base, a thin, clear, base coat that helps prep for the polishes and begins to mask the look of layers of nail on the tips of my nails. Pink Perfector is next which is a translucent rosy pink that helps correct discoloration and camouflages flakes. The Tip Perfector is a relatively opaque creamy white polish that is applied to tips to brighten and accent them. I read a lot of people's comments on Zoya's Facebook about how it's too opaque for nails to look natural, however I like to apply a second coat of Pink Perfector after using it to blur the tips before applying the Satin Seal Top Coat. Unfortunately I don't have a picture of the top coat, but it's a gorgeous mostly matte finish which also blurs imperfections and really gives a natural appearance.

The wear, unfortunately, is not as long as I would like. With my nails I would say I can get maybe four days. I want to try it out with a bonding base coat and see if that increases its wear time! My friend wore it for over a week on her strong, long nails and it looked amazing the whole time.

Overall, I really like these products and I'm going to repurchase them when I run out!
Have any of you tried any other colors of perfector or Naked Manicure in general? What do you think?
Thanks for reading! xo

Thursday, June 18

Maybelline Dream Bouncy Blush First Impression


I recently had a coupon for buy one get one half off Maybelline products. I figured it was the perfect time to use it since I had just been obsessing over trying a red cream blush and decided to pick out the Maybelline Dream Bouncy Blush in "Hot Tamale."

In regards to packaging, I do like the flip top lid with the raised, rounded product. The blush does feel "bouncy" in a sense; when I push on it a small indent forms that goes back to normal over time. I don't love the texture, however; it's somewhat frustrating since I like to use my fingers to apply cream blushes like this when I don't use my Beauty Blender and it ruins the appearance. The airy, "bouncy" feeling also makes the blush seem delicate and easy to ruin. The wear isn't as long as I would expect from a cream blush, however it does last for hours. It's very pigmented so a little goes a long way. The blush isn't as red swatched, though, in comparison to the color in the packaging.

What other Dream Bouncy colors are good? Does the texture freak out anyone else?!
Thanks for reading! xo
Hannah


Monday, May 18

May Julep Unboxing ♡


Julep recently released brow products and I felt obligated to try one out since I'm a brows girl now. I bought the "lock down your brows" Iconic Brow Gel and two nail polishes: Becca and Denise.


| Boho Glam- Becca | $14.00, $11.20 Maven
I picked Becca since I don't own a whole lot of green-based nail polishes. I own more than enough mint/teal colors, but I only have one true green, Essie First Timer, which turns too yellow with my Seche Vite top coat. This color isn't necessarily a "true" green; it does have very small blue shimmer. It kind of reminds me of Ariel's fin which is absolutely exciting for me.


| Bombshell- Denise | $14.00, $11.20 Maven
I don't have a color even close to this electric purple. It's so gorgeous and bright! The swatch picture at the top of this post demonstrates that it turns matte when dry which makes it easy to see when I can apply the next coat.


| Lock Down Your Brows Iconic Brow Gel | $22.00, $17.60 Maven
I've been using my It Cosmetics Brow Power pencil for months now and I'm so in love with it! I, however, have pretty long brow hairs that are necessary for any kind of shape so I have to hold them down. For years I've just used a clear mascara but it wears off quickly so I hoped an actual brow gel would do a better job. I've used this several times and I really like it so far! The brush is very small (think Benefit's Gimme Brow) and is great for accuracy.

Totals:
Full-price: $50
Maven: $40

And there's my little unboxing! Unfortunately I couldn't find Becca and Denise on Julep's website but I'm sure they'll be available soon! I'm sorry this post is a bit late; I've been so busy getting ready to graduate high school! If you want more unboxings, I've written a post on April, March, February, January, December, October, August, and July.

Monday, April 13

April Julep Maven Unboxing ♡


It feels like it's been years since I've written a blog post! I know it's been less than a month, but April has felt like it's several months long itself. I'm graduating from high school in June and my advanced classes are kickin' my booty right now. 
Complaining aside, I am so excited to be unboxing my April Julep box!


| Addison- It Girl | $14.00, $11.20 Maven
I picked out this babe because I only have one other bright yellow polish and it's a China Glaze color that isn't very opaque. Little did I know, this would only be a little more opaque than Sun Upon My Skin, but it's cooler toned, brighter, and I love the way it looks even though it is a bit more neon than I expected from the pictures.


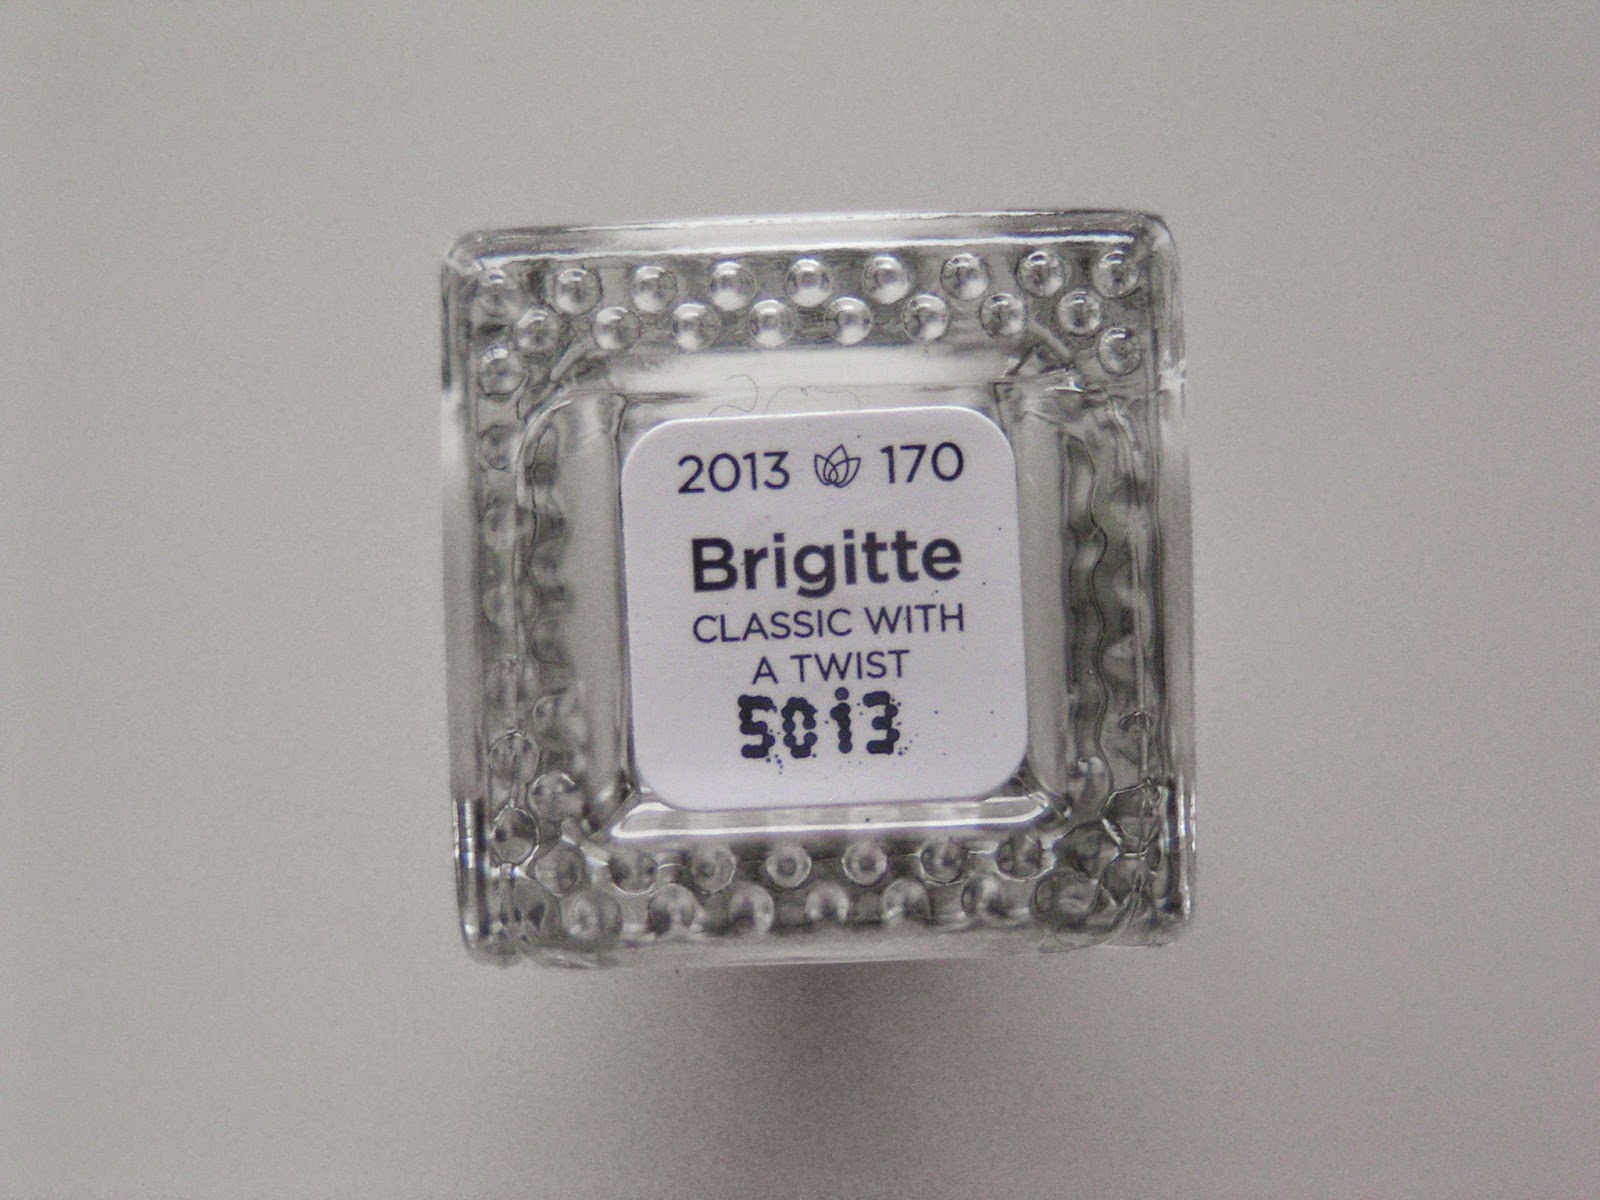
| Brigitte- Classic with a Twist | $14.00, $11.20 Maven
I don't personally own any good quality solid white cremes so when I saw Brigitte during the Maven reveal, I immediately added her to my box. If you remember Dana from my October unboxing (one of my go-to Julep colors) I've tried out a white Julep polish before and been really impressed and this isn't any different! It's definitely opaque and cool toned, makin' me look tan and springy.


| Oxygen Bonding Base Coat | $18.00, $14.40 Maven
The Orly Bonder Rubberized Base Coat (Sally's is a good deal) is my go-to whenever I paint my nails, which is about twice a week. I've noticed recently, however, that the tips of my nails look a little orange-y yellow tinted and I'm not sure what else it could be besides my trusty Orly Bonder. :( I decided to grab this guy for April since it's almost never available and it's a little spendy for me to try on a whim! I've tested it out once and I think its wear time isn't quite as good as Bonder's but I do like it so far!

Totals:
Full-price: $46.00
Maven: $36.80

If you're hooked on unboxings, I've also posted about my March, February, January, December, October, August, and July boxes!
If you want to sign up for Julep, use this link to get a free $62 value welcome box with a lip gloss and three gorgeous polishes! The link also hooks me up with a $15 credit if you sign up so it's really a win-win. ;)
Thanks for reading! What did you guys get in your April boxes?
xo

Wednesday, March 18

March Julep Maven Unboxing ♡


It's Julep unboxing time again! These are some of my favorite posts to write especially since I love me some nail polish. This month I picked out Ali (Boho Glam) and Janet (It Girl) as my main box additions and Harmony (It Girl) as my add-on since I couldn't pass up anything holographic.


| Ali- Boho Glam | $14 ($11.20 Maven)
Ali is a light pastel mint/seafoam with a semi-silk finish. The finish doesn't mean much to me since I always use my Seche Vite top coat, but it does dry to a really nice texture. It looks more minty when it's alone, however it's brighter and more green than any of the other mints I own. The swatch color is the most accurate, however it makes Shelly look almost grey. True-to-color swatches for it are in my January unboxing.


| Janet- It Girl | $14 ($11.20 Maven)
This was the first polish I added to my box for March because who doesn't love peach everything?? I don't have any peach nail polishes, which I'm slightly alarmed with now, and this color is perfect. It's a very soft peach that also has the "soft focus" effect when it's dry. It's a lot lighter than Phyllis, another color from January, that I would've also put in the soft pink family. The difference between the two isn't quite as noticeable, I think the swatch is a little too dramatic. Does "Janet" automatically remind anyone else of the Rocky Horror Picture Show? That's probably part of the reason I love this polish so much.


| Harmony- It Girl | $14 ($11.20 Maven)
I almost didn't pick this one up since I already have Sally Hansen's Pearly Whites, which I thought was similar, but I'm so glad I went for Harmony. It's described as "holographic jagged-cut glitter" which is accurate. One of the main differences between Harmony and Pearly Whites is the color of the glitter. The latter's seems to have some pigmentation and small, circular flecks while Harmony's glitter is completely transparent. I love the way it looks over both Janet and Ali.

Totals:
Non-Maven: $42 
Maven: $33.60 

Those are my three beauts from the Pop collection! I'm slightly disappointed, however. I just noticed Ming was also available for March and it's a jelly so I'm hoping I can add it on for April!
If you'd like to take a shot with Julep's customizable nail polish and makeup subscription, use this link and the promo code "SPRING" to get a metallic, coral, and light pink nail polish with a bonus lip gloss all for free! You can cancel any time so there's no risk of being trapped. 

If you want to read any of my other unboxings, I've also written one for July, August, October, December, January, and February
Thanks for reading! xo Hannah

Saturday, March 14

♡ What's in My Purse? ♡


I was carrying the Forever 21 Zippered Mini Satchel for a few months but it was able to hold too much for my weak, old woman back. Also, unfortunately, one of the pins came off the corners and although I emailed them they said there wasn't anything they could do. :(
My best friend and I were taking a stroll through Ross when I noticed this adorable and pretty small Nine West Blecker crossbody hanging on the purse rack. I essentially ran to it; I'd been looking for a bag that resembled the Kate Spade one Leigh Ann hauled back in November. I couldn't bring myself to pick up an authentic one, mostly because it's real leather and also because of the price. Anyway, I'm so glad I found this little guy at Ross for $17! The same purse is available here in an oatmeal color with gold accents!


| Travalo | 
I keep this in my purse year-round but I'm always switching out the scent. I bought mine in pink at Kohl's since they were out of silver but they're all over now! Ulta sells a similar atomizer but it's a bit bigger and I like how compact this one is. Lately I've been using Pacifica's Tuscan Blood Orange perfume because it smells exactly like Zebra Stripes gum. Pacifica is also a brand from Portland which is wonderful!

| Kikkerland Nail Clippers |
I keep nail clippers around 24/7 since I can't handle hangnails or split nails. My mom bought these for me years ago and they still work amazingly! They're available through Amazon in silver as a set with the bigger nail clippers in the shape of a foot and also on Birchbox in a gold/rose gold color.

I bought this in Ulta specifically for this purse since EOS is my go-to lip balm brand but the spheres are too big for the outer compartment. I've really been liking this however I don't think it's as hydrating as my usual Medicated Tangerine scent.

I also bought this at Ulta since it's so flat and compact. I originally bought the Berry Blossom scent but it clashed with my perfume so I resorted to this one since it's very subtle and nearly unscented. It's also available in Cucumber!


| Little Mermaid Set the Mood Mirror by Sephora |
I bought this in September of 2013 as a matching present with my best friend for her birthday. I hope you don't mind a few close ups because this girl is gorgeous. I feel so fancy when I pull it out of my purse. I keep it a mint green pouch that I made (seen in the wallet side picture of the purse) to keep it safe. There's still some available on Ebay or Amazon but they range anywhere from $40 to $100 now, double and five times more than they were when Sephora released them.

| iPhone 6 in Gold + Headphones |
I upgraded to this phone from a shattered 4S back in January and I am so happy with it! The gold on the back is a true gold in artificial light but very rose gold in natural daylight and it's the reason I picked up the gold color. I've also been liking the headphones, however the new shape falls out of my ear since they're a little too big.

That's everything I can fit in my little purse! I'm really liking it, though, even though it doesn't have a small handle. 
What's your purse essentials? 
Thanks for reading! xo Hannah