Showing posts with label recipe. Show all posts

Tuesday, August 2

Perfect and Soft Chocolate Chip Cookies Recipe


I have loved chocolate chip cookies for as long as I can remember (like many people I assume), however since the thick and soft ones are my favorites, I hunted for a long time to find the perfect recipe for me. I found it through Sally's Baking Addiction and now it's my go-to! I do make them a bit differently than she does but the recipe is hers.

| Ingredients |
  • 2+1/4 cups all purpose flour
  • 1 tsp. baking soda
  • 1+1/2 tsp. cornstarch
  • 1/2 tsp. salt
  • 3/4 cup (1.5 sticks) unsalted butter)
  • 3/4 cup loosely packed brown sugar
  • 1/2 cup granulated sugar
  • 1 large egg + 1 egg yolk, cold
  • 2 tsp. vanilla extract (or 1+1/2 tsp vanilla, 1/2 tsp vanilla, butter, nut flavoring) 
  • 1 cup mini chocolate chips
| Directions |
  1. Preheat oven to 350 degrees.
  2. In a large bowl, stir together the flour, baking soda, corn starch, and salt and set aside.
  3. In a medium microwave safe bowl, heat the butter for 15-20 second intervals until it's about half melted. Using a whisk, stir until it is entirely liquid but still opaque yellow.
  4. Whisk in the brown and white sugar.
  5. Whisk in the whole egg first, followed by the yolk, and lastly the vanilla. The cold eggs and partially melted butter will create a thick wet dough that can bypass the refrigerating step!
  6. Using a rubber spatula, add the wet ingredients to the dry and stir until almost combined but small ribbons of flour remain. Add the chocolate chips and stir completely.
  7. Using a cookie scoop, scoop dough onto a silicone baking mat (or parchment paper) about two inches apart. Using a few extra chocolate chips, place them on top of bare areas on the cookies before baking (it makes them look super cute and fancy)
  8. Bake for 13-15 minutes. The bottom of the cookies should not be much darker than the tops. Allow to cool 5-10 minutes on the tray to finish baking, unless the bottoms are golden and the cookies hold together well!
I love these cookies so much. They're soft but they hold up really well in cookie jar or in a lunch box ;) This recipe is also a really good base for other flavored cookies as well! I've used it to make banana chocolate chip ones, black forest, and double chocolate. Let me know if you give it a shot!

Thanks for reading! xo
Hannah 

Wednesday, April 20

Chickpea Salad Sandwich Recipe


The amount of recipes I post isn't particularly representative of how much I bake and cook, however whenever I make a recipe I think other people might enjoy I try to share it! Yesterday I made a chicken salad sandwich for my dad and had forgotten how much I enjoy them. Using chickpeas I created a similar alternative that tastes great and is still a good source of protein. While this is a good alternative to chicken salad for vegetarians, it's actually pretty healthy for everyone! Here's a link to some dietary info on chickpeas. The gist is that one cup of chickpeas has 4g of fat, 12g of dietary fiber, and 15g of protein. This recipe makes at most two sandwiches or one sandwich and some cracker spread ;)

| Ingredients |
  •  1 cup chickpeas, cooked and rinsed
  • 2 tbsp diced tomato
  • 1-2 slices of bread
  • 2 tbsp grated cheese 
  • 1 tbsp dill or sweet pickle relish
  • 1/4 cup chopped spinach
  • 1-2 tbsp light mayonnaise (less if you're using regular mayo!)
  • salt and pepper
  • optional: 1 tbsp diced sweet onion
 | Directions |
  1. In a food processor, pulse the peas until they're about 75% smooth. This can also be done with a potato masher, fork, or mixer if that's more convenient.
  2. In a bowl, add rest of the ingredients (besides bread slices) to the chickpeas and stir until combined. Sometimes I add a little garlic and onion powder as well to add a bit more flavor.
  3. Spread a bit of mayonnaise (or flavored cream cheese!) on a slice of bread and pile on the chickpea salad. Finish off with the other slice or leave it off for an open faced sandwich.
This would also be tasty with some diced bell pepper, cucumber, avocado, or any other veggies.
I've also posted an avocado chicken salad sandwich recipe!

Thanks for reading!
xo Follow my blog with Bloglovin

Tuesday, December 23

Recipe ♡ Iced Sugar Cookies


I make sugar cookies year-round, but they are an absolute necessity during the holidays. I've been using the same recipe for years since it's so good and I've altered it but I'm not sure where it's from. I just made these yesterday and may or may not be eating some as I write this. 
This recipe does need to be refrigerated so the cookies keep their shape so make it a bit ahead of time! These are great as a decorating activity for Christmas or Christmas Eve but they're also really good for other holidays like Valentine's Day or Easter.

Here is a downloadable/printable copy of the cookie recipe.
And the icing recipe.

| Ingredients |
  • 1 and 1/2 cups softened butter
  • 2 and 1/4 cups white sugar
  • 4 eggs
  • 1 1/2 teaspoons vanilla extract
  • 5 cups flour
  • 2 teaspoons baking powder
  • 1/2 tsp salt

| Directions |

Cookies:
  1. Preheat oven to 400 degrees Fahrenheit. 
  2. Cream together the butter and sugar for about two minutes, until smooth and fluffy.
  3. Beat in each of the four eggs one at a time then add the vanilla.
  4. Fold in the flour, baking powder, and salt. *I always use my hands to mix it in well since the dough is very thick.
  5. Cover the dough (or move to an airtight container) for at least and hour, but the longer the better!
  6. Roll out onto a floured surface up to half an inch thick. I usually do between a quarter and half.
  7. Cut out shapes with desired cutters (like the adorable Christmas ones I used) and place about an inch apart on an un-greased cookie sheet, parchment paper, or a silicone baking mat. 
  8. Bake for 6-8 minutes, or until the bottoms are barely turning golden.


 Icing: (I modified this recipe)

  1. For the border icing, mix together 1 and 1/2 cups powdered sugar, 1/2 tsp vanilla extract (or other flavor), and 2 and 1/2 tablespoons milk. Feel free to adjust milk and sugar proportions to desired consistency if needed! Put this in a piping bag with a small tip (or cut the end off) or into a condiment bottle. *I struggled getting the consistency right for me off the recipe, so I made it extra thick and popped it in the microwave for about 5-7 seconds between each round of icing to make it a little easier for my weak wrists.
  2. For the "flood" icing to fill the shapes, mix together 1 and 1/4 cups powdered sugar, 1/2 teaspoon vanilla (or other), and 1 and 1/2  to 2 tablespoons milk. Adjust consistency  if needed. After it's smooth, split it up evenly into small bowls and mix in food coloring. I used red, green, yellow, and blue. Move the colored icing into piping bags or condiment bottles.
  3. First, pipe around the edge of the cookies with the border icing and wait until it's dry. Then carefully outline and fill in the shapes and let dry for 12-24 hours. The icing can be kept in the fridge for a few days! 

I found the cookies tasted extra sweet when the icing was wet and it wasn't overbearing once it was dry, but these are seriously so good. I love small ones like I made this year in particular and my dad has certainly been enjoying them as well. If you try these out, please let me know!
Merry Christmas and thanks for reading! xo

Tuesday, August 12

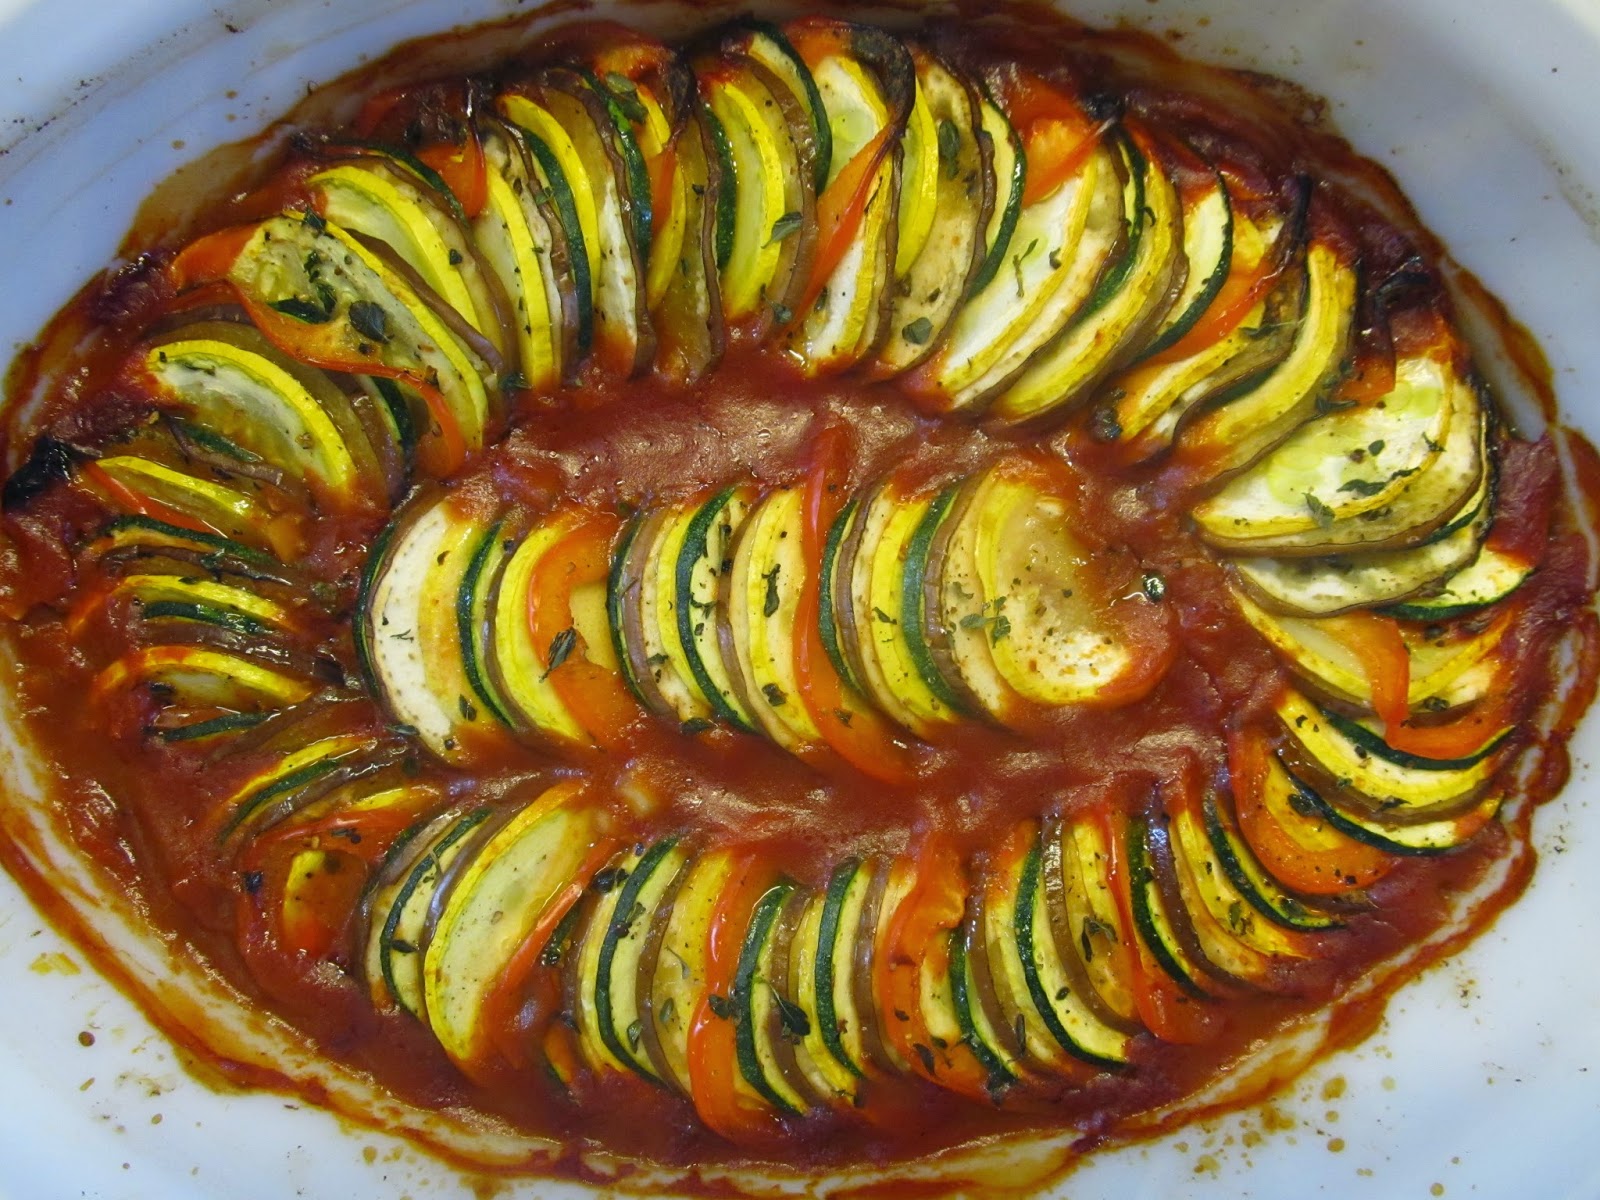
"Ratatouille" Inspired Ratatouille Recipe


I absolutely love the Disney Ratatouille movie. It's not only really cute, but the food looks so good. How do they do that to you with animated movies?! When it came out in theaters I was young enough that my mom had to drop us off and pick us up again. I watched it again about a year ago and I so badly wanted to eat the Ratatouille that Remy prepares. I went immediately to Google and searched all over and some of the recipes looked nothing like Ratatouille's and were almost more like a soup. I eventually stumbled on Smitten Kitchen's "Ratatouille's Ratatouille" recipe that's supposed to be like Remy's. Not only does it actually look like the movie's, but it's so darn good. It's become a staple for a dinner side dish. This is my recreation/slightly altered version of Smitten Kitchen's!


| Ingredients |

-1 eggplant (I use the Italian ones since they're skinny)
-1 large yellow squash
-1 cup tomato puree 
-1 large zucchini
-1/2 an onion
-2-3 cloves garlic (I use 3)
-1 bell pepper
-2 tbsp. olive oil
-Salt and pepper
-Fresh thyme
-Parchment pepper
-Goat cheese (optional topping)


| Directions |

  1. Preheat your oven to 375 degrees fahrenheit.
  2. Cut off the ends of the eggplant, yellow squash, and zucchini. Using a thin blade on a mandolin slicer (not to be confused with the instrument), slice all of them and set them aside. Cut off the top and bottom of the bell pepper and clean out the middle to make it like a tube. Also slice this on the mandolin then cut in half.
  3. Finely chop the half onion and mince the garlic.
  4. In a 2 and a half quart oval Pyrex dish, add the tomato puree, onion, garlic, and 1 tablespoon of the olive oil. Heavily salt and pepper.
  5. In whatever order, layer the yellow squash, eggplant, zucchini, and bell pepper in an oval around the outside. Sometimes if I don't get a lot of pepper I'll layer them every other vegetable pattern instead. I always fill in the middle with a small row.
  6. On top of the ratatouille, drizzle the other tablespoon of olive oil and sprinkle more salt and pepper. Holding the sprig of thyme at the top, strip off the leaves and add them onto the ratatouille as well.
  7. Cut a piece of parchment paper to fit right on top of the ratatouille to avoid any burning. 
  8. Bake for 45-55 minutes. When done, the vegetables should be mostly translucent and the tomato mixture should be bubbling.
  9. Serve with a dollop of goat cheese and more salt and pepper if desired. 
Let me know if you guys try this out! Also, be really careful with mandolin slicers because when I was putting my blade in my new one I cut completely through my thumbnail and into my nail bed. Yikes! I couldn't wear nail polish for about two months..
Thanks for reading! xo

Sunday, May 11

Orange Creamsicle Cupcake Recipe!


I'm an avid baker and since springtime is finally here, fruity baked goods are a necessity to me. I first made these cupcakes about over a year ago (maybe two?) at my grandparent's cabin over vacation and I've made them several times since. The original recipe is from this blog if you want to take a look. I hope you guys like these; they are so dang good!

| INGREDIENTS |

 Cupcakes:
-2 cups all-purpose flour
-1/4 teaspoon baking powder
-1/4 teaspoon baking soda
-1/4 teaspoon salt
-1/2 cup softened butter (1 stick)
-1 cup granulated sugar
-1 1/2 tablespoons orange zest (I used 2 oranges)
-2 eggs
-3/4 cup heavy cream
-1/4 cup fresh orange juice
-1 1/2 teaspoons orange extract
-1 teaspoon vanilla extract

Cream Cheese Frosting: 
-1 stick softened butter
-1 stick softened cream cheese (I use the 30% less fat hard-to-pronounce stuff)
-2-3 cups confectioner's sugar
-1 teaspoon vanilla
-1/4 teaspoon orange extract (optional)


| DIRECTIONS |


| CUPCAKES |

1. Preheat oven to 350 degrees Fahrenheit.
2. In a bowl using a whisk, combine 2 cups flour, 1/4 teaspoon baking powder, 1/4 teaspoon baking soda, and 1/4 teaspoon salt.
3. In a relatively large mixing bowl (you'll be adding dry ingredients and cream to it) blend together 1/2 cup softened butter, 1 cup granulated sugar, and 1 and a 1/2 tablespoons orange zest using a medium-high setting on a mixer. Mix until pale and fluffy. (it will smell delicious!)
4. Mix in an egg, incorporating completely. Mix in the other egg the same way.
5. In a large liquid measuring cup, stir together the 3/4 cup heavy cream, 1/4 cup fresh orange juice (you can use the same oranges from the zest!), 1 and a 1/2 teaspoons orange extract, and 1 teaspoon vanilla extract. 
6. Using a low setting, start with the flour mixture and combine. Alternate with the cream mixture 3 times, also ending with the flour mixture. The batter should look something like the picture above and will be very thick.
7. Line muffin tins and fill 3/4 of the way with batter. (I used Wilton's "Color Cups" in a rainbow polka-dot pattern) Cook in the oven for 23-25 minutes until a toothpick comes out clean. For even baking, rotate when halfway through the cooking time.

| FROSTING | (this is my go-to for every cupcake recipe I bake)

1. With a mixer, whip together a stick of softened butter and softened cream cheese until completely combined.
2. Add 1 teaspoon of vanilla and 2-3 cups of confectioner's sugar to taste. I know that's a large margin, but it really depends on your preference! I just taste as I go until it feels like the right balance. You can also add 1/4 teaspoon of orange extract if you want some extra orange flavor.

That's all you have to do! It's pretty easy, and they are delicious. Like Cooking Classy said, if the taste is too heavy you can substitute half and half in instead of the heavy cream. For my liners I used Wilton's Color Cups in a really cute rainbow polka dot pattern. If you haven't tried any foil-lined cupcake liners, do it! They're awesome especially for chocolate cakes.
Thanks so much for reading! xo